Following are the steps that we will take:
- Importing Libraries and Classes
- Loading in the Data
- Tokenizing the text
- Creating a Dataset object for Tensorflow
- Fine-tuning Option 1: Using native Tensorflow
- Fine-tuning Option 2: Using the TFTrainer class
- Saving & Loading the model
- Making Predictions with new data
- Bonus: Loading the saved model in Pytorch and making predictions
1. Importing Libraries and Classes
Making sure we have the latest version of transformers
!pip install git+https://github.com/huggingface/transformers.git
Importing the required libraries
from transformers import DistilBertTokenizer
from transformers import TFDistilBertForSequenceClassification
import tensorflow as tf
import pandas as pd
import json
import gc
2. Loading in the Data
We will be using the "BBC articles fulltext and category" dataset available through Kaggle. You can download the dataset from here. The downloaded zip file contains just one file: bbc-text.csv.
There are 2225 rows of data and the following two columns:
text - the full text of the articlecategory - Category of the article ('tech', 'business', 'sport', 'entertainment', 'politics').
I've chosen this dataset for the following reasons:
- It's a very simple dataset with clear text content and target labels. It should be easy for anyone to understand what the text and the different categories are about.
- It's a small dataset which will result in small training time. This helps the purpose of this tutorial which is simply to demonstrate a technique and for you to follow along easily.
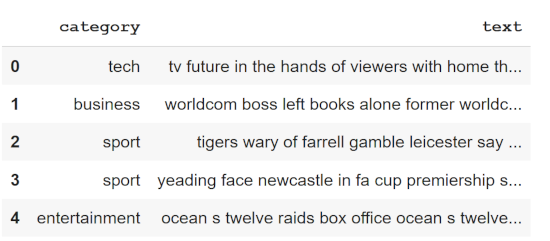
Let's start coding by loading in this data using Pandas.
Loading in the data
df = pd.read_csv('/data/bbc-text.csv') # Change path to your download location
df.head()
See what categories there are
array(['tech', 'business', 'sport', 'entertainment', 'politics'], dtype=object)
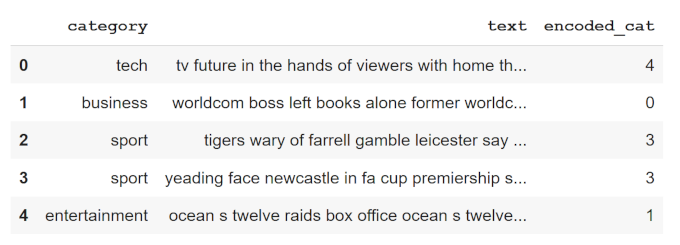
So there are a total of 5 unique categories represented as strings. We need to encode them by assigning each with a unique number. The following code does that:
Create a new column and encode the category labels
df['encoded_cat'] = df['category'].astype('category').cat.codes
df.head()
Let's now define the columns that will become our features and labels, and convert them to lists.
Define Features and Labels
data_texts = df["text"].to_list() # Features (not-tokenized yet)
data_labels = df["encoded_cat"].to_list() # Lables
Please note that data_texts still has to be converted to tokenized vectors before we can use it in a machine learning model. We will do that in the "3. Tokenizing the text" section.
The following code splits our data into training and validation sets, which we will use to train and evaluate the model. I have also taken a small slice (0.01 fraction) out of the train data as test data. We will use this, not to evaluate the model, but just to test our final model in the "8. Making Predictions with new data" section of this tutorial.
Spliting data into training, validation and testing sets
from sklearn.model_selection import train_test_split

# Split Train and Validation data
train_texts, val_texts, train_labels, val_labels = train_test_split(data_texts, data_labels, test_size=0.2, random_state=0)

# Keep some data for inference (testing)
train_texts, test_texts, train_labels, test_labels = train_test_split(train_texts, train_labels, test_size=0.01, random_state=0)
3. Tokenizing the text
Fine-tuning in the HuggingFace's transformers library involves using a pre-trained model and a tokenizer that is compatible with that model's architecture and input requirements. Each pre-trained model in transformers can be accessed using the right model class and be used with the associated tokenizer class. Since we want to use DistilBert for a classification task, we will use the DistilBertTokenizer tokenizer class to tokenize our texts and then use TFDistilBertForSequenceClassification model class in a later section to fine-tune the pre-trained model using the output from the tokenizer.
The DistilBertTokenizer generates input_ids and attention_mask as outputs. This is what is required by a DistilBert model as its inputs.
Encoding train_texts and val_texts
tokenizer = DistilBertTokenizer.from_pretrained('distilbert-base-uncased')
train_encodings = tokenizer(train_texts, truncation=True, padding=True)
val_encodings = tokenizer(val_texts, truncation=True, padding=True)
So, in the above code, we defined the tokenizer object using the from_pretrained() method which downloads and caches the tokenizer files associated with the DistilBert model. When we pass text through this tokenizer the generated output will be in the format expected by the DistilBert architecture, as stated above. We use padding and truncation to make sure all the vectors are the same size.
You can learn more about DistilBert and it's tokenizer from the DistilBert section of the transformers library's official documentation. And more info regarding the padding and truncation options is available here.
Now that we have our texts in an encoded form, there is only one step left before we can begin the fine-tuning process.
4. Creating a Dataset object for Tensorflow
Before we can move on to the fine-tuning phase, we need to convert our input encodings and labels into a TensorFlow Dataset object. We do this by passing them to the from_tensor_slices constructor method.
train_dataset = tf.data.Dataset.from_tensor_slices((
    dict(train_encodings),
    train_labels
))
val_dataset = tf.data.Dataset.from_tensor_slices((
    dict(val_encodings),
    val_labels
))
Now, our data is in the right format and we can use it to fine-tune a model.
5. Fine-tuning Option 1: Using native Tensorflow
We use the from_pretrained() method to initialize a pre-trained model. This will load in the weights and initialize the model with the preset configurations.
Building the model and compiling it
model = TFDistilBertForSequenceClassification.from_pretrained('distilbert-base-uncased', num_labels=5)

optimizer = tf.keras.optimizers.Adam(learning_rate=5e-5)
model.compile(optimizer=optimizer, loss=model.compute_loss, metrics=['accuracy'])
The DistilBert model and other models available in the transformers library are standard tf.keras.Model classes (and torch.nn.Module in the case of Pytorch), and so you may use them just as you would use a model that you may have defined yourself using the native TensorFlow and Keras API. Also, notice the num_labels=5 parameter, this is because we have a total of 5 classes.
It is also possible for you to customize the model by changing its configuration. You can learn more about that here.
The data is prepared and the model is defined. Let's begin training!
Training (Fine-Tuning)
model.fit(train_dataset.shuffle(1000).batch(16), epochs=3, batch_size=16,
          validation_data=val_dataset.shuffle(1000).batch(16))
Epoch 1/3
    111/111 [==============================] - 63s 572ms/step - loss: 0.4193 - accuracy: 0.9200 - val_loss: 0.0748 - val_accuracy: 0.9865
    Epoch 2/3
    111/111 [==============================] - 62s 560ms/step - loss: 0.0680 - accuracy: 0.9847 - val_loss: 0.0426 - val_accuracy: 0.9888
    Epoch 3/3
    111/111 [==============================] - 62s 561ms/step - loss: 0.0481 - accuracy: 0.9869 - val_loss: 0.0615 - val_accuracy: 0.9798
After 3 epochs we get an accuracy of 0.987 and a val_accuracy of 0.98. Not bad!
The model is fine-tuned and evaluated using the train_dataset and val_dataset that we created earlier. The shuffle() method shuffles the elements of the dataset, and batch() creates batches with batch_size of 16. The values were arbitrary set by me. They produce great results for me and I haven't experimented with them much; however, you can try different values if you like. To learn more about these and other methods of Dataset, please refer to the the docs.
Now our model is fine-tuned and is ready to be saved and used to make predictions on new data. The next section, however, discusses using the provided TFTrainer class, which is an alternative method to fine-tune a model in transformers.
6. Fine-tuning Option 2: Using the TFTrainer class
The TFTrainer (Trainer for Pytorch) is a class provided by the transformers library that offers a simple, yet feature-rich, method of training and evaluating models.
The following code shows how to define the configuration settings and build a model using the TFTrainer class.
Defining the options for training
from transformers import TFDistilBertForSequenceClassification, TFTrainer, TFTrainingArguments

training_args = TFTrainingArguments(
    output_dir='./results',          # output directory
    num_train_epochs=3,              # total number of training epochs
    per_device_train_batch_size=16,  # batch size per device during training
    per_device_eval_batch_size=64,   # batch size for evaluation
    warmup_steps=500,                # number of warmup steps for learning rate scheduler
    weight_decay=0.01,               # strength of weight decay
    logging_dir='./logs',            # directory for storing logs
)

with training_args.strategy.scope():
    trainer_model = TFDistilBertForSequenceClassification.from_pretrained("distilbert-base-uncased", num_labels=5)

trainer = TFTrainer(
    model=trainer_model,                 # the instantiated 🤗 Transformers model to be trained
    args=training_args,                  # training arguments, defined above
    train_dataset=train_dataset,         # training dataset
    eval_dataset=val_dataset,             # evaluation dataset
)
The TFTrainingArguments is how we set customization arguments for the training loop and later use them in the TFTrainer class. We instantiate the model using theTFDistilBertForSequenceClassification class. And then finally, we build the model by instantiating the TFTrainer class and passing in the different options we have defined along with our datasets.
Training
Printing out the evaluation metrics
More about the TFTrainer/Trainer class.
7. Saving & Loading the model
After you are done training a model, you most likely want to save it so that you can use it for inference later. The save_pretrained() method is used to save both the model, and the tokenizer, and all the files associated with them in a directory.
Saving the model and the tokenizer
save_directory = "/saved_models" # change this to your preferred location

model.save_pretrained(save_directory)
tokenizer.save_pretrained(save_directory)
The from_pretrained() method accepts either a model name or a directory to load a model or a tokenizer. Initially, we used the model name (distilbert-base-uncased) to load in our desired model. This time, we will specify the directory to load the saved model.
Loading the model and the tokenizer
loaded_tokenizer = DistilBertTokenizer.from_pretrained(save_directory)
loaded_model = TFDistilBertForSequenceClassification.from_pretrained(save_directory)
Note: When you use thefrom_pretrained() method to initialize a tokenizer or model, the library will download and cache files like the model weights file, tokenizer vocab file, and config files and save them locally. The from_pretrained() method allows you to specify the name of the model that it recognizes or a directory name where it can find the necessary files. You may have to choose one over the other, depending on your application. So for example, in a production environment, you may want to pre-download a model and have it always available in your filesystem.
You can find more information about this in the official documentation. This StackOverflow answer also does a good job of providing some practical solutions.
8. Making Predictions with new data
Let's now actually use our fine-tuned model on a sample text from test_text that we created earlier, and see if it can classify the text correctly.
Sample text
test_text = test_texts[7]
test_text
microsoft takes on desktop search microsoft has entered the desktop search fray releasing a test version of its tool to find documents e-mails and other files on a pc hard drive. the beta program only works on pcs running windows xp or windows 2000. the desktop search market is becoming increasingly crowded with firms touting programs that help people find files.
This text seems like its related to the tech category, which is encoded as 4. Let's see if our model gets this right.
predict_input = loaded_tokenizer.encode(test_text,
                                 truncation=True,
                                 padding=True,
                                 return_tensors="tf")

output = loaded_model(predict_input)[0]

prediction_value = tf.argmax(output, axis=1).numpy()[0]
prediction_value
4
Our fine-tuned model correctly identified it as a tech category text.
9. Bonus: Loading the saved model in Pytorch and making predictions
Just to showcase the fantastic TensorFlow/Pytorch interoperability feature of transformers, I decided to add this bonus section where I can show you how to load this model, that was fine-tuned using TensorFlow, into Pytorch.
This is the same text we used earlier
test_text = test_texts[7]
test_text
microsoft takes on desktop search microsoft has entered the desktop search fray releasing a test version of its tool to find documents e-mails and other files on a pc hard drive. the beta program only works on pcs running windows xp or windows 2000. the desktop search market is becoming increasingly crowded with firms touting programs that help people find files.
Loading in the model for Pytorch
from transformers import DistilBertForSequenceClassification

loaded_tokenizer_pt = DistilBertTokenizer.from_pretrained(save_directory)
loaded_model_pt = DistilBertForSequenceClassification.from_pretrained(save_directory, from_tf=True)
The DistilBertForSequenceClassification is the Pytorch equivalent class of TFDistilBertForSequenceClassification that we used for TensforFlow - we just have to add "TF" to get the same model in TensorFlow. We use the sameDistilBertTokenizer class in Pytorch as we did for TensorFlow, as tokenizer classes in transformers are platform agnostic. Notice also that we added from_tf=True to specify that we want to load a model that was fine-tuned using Tensorflow. Similarly, we would have written from_pt=True, if we were loading a model trained using Pytorch into TensorFlow.
Let's test the loaded model.
Making predictions in Pytorch using the fine-tuned model
import torch
predict_input_pt = loaded_tokenizer_pt.encode(test_text,
                                 truncation=True,
                                 padding=True,
                                 return_tensors="pt")

output_pt = loaded_model_pt(predict_input_pt)[0]

predictions_value_pt = torch.argmax(output_pt[0], dim=-1).item()
predictions_value_pt
4
We got the same result, as expected. Perfect!
10. Conclusion
Hope this tutorial was helpful to you. I tried to be very precise and share enough details about each step, and I hope that I did a good job at it. Here are some additional resources that you may find useful:
If you liked this tutorial, please consider sharing it. Thank you for reading!