I have a spare domain name (sunnyville.me) registered at Namecheap.com, and I will use that for the demonstration.
1. Pointing the Domain name to our GCP Instance
Step 1: Set up Google Cloud DNS
We will start by setting up the necessary configurations at Google Cloud Platform's Console.
Currently, the IP address assigned to our instance is ephemeral, meaning that it can change if we restart our instance, or edit it in some way. Instead, we need to set up a static IP address and assign that to our instance.
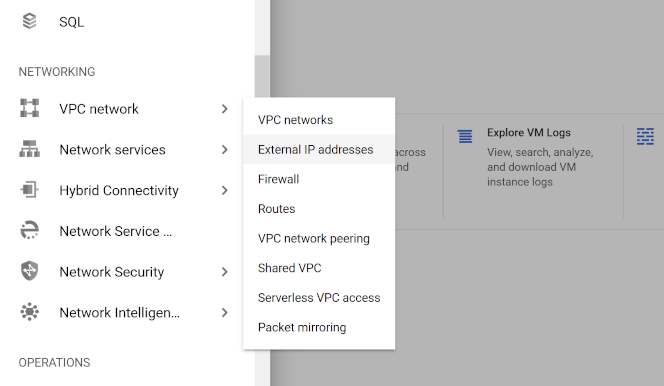
Go to VPC network > External IP addresses. Then click RESERVE STATIC ADDRESS.
Fill in the details of the static IP address.
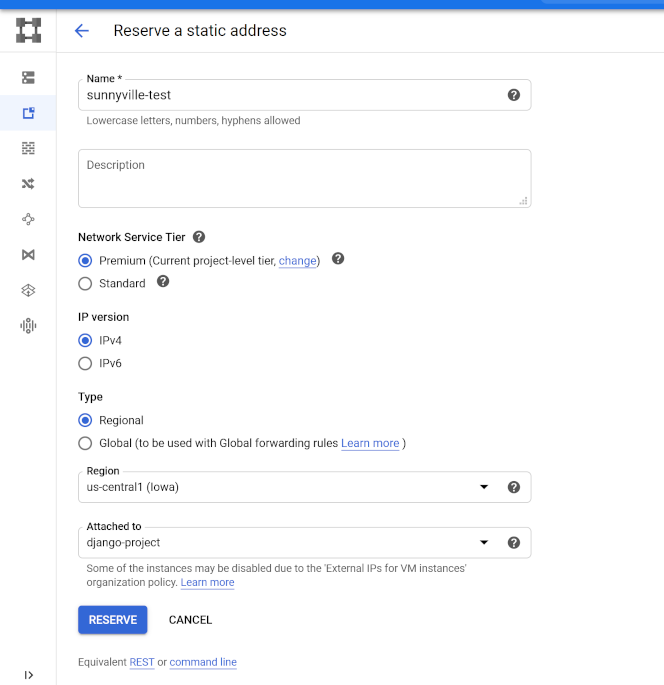
- Name: This can be whatever you like.
- Region: This, I believe should be the same as your VM instance.
- Attached to: Select the instance of your deployed application.
Click "Reserve".
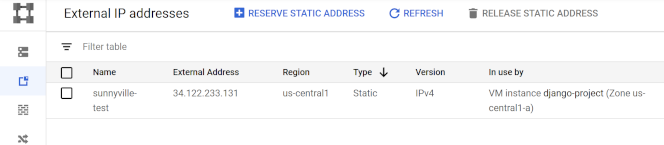
You should now see that a new static IP address has been created and assigned to your instance.
If you haven't guessed already, we will need to make some changes to our initial setup, as we are dealing with a new IP address.
Next, we need to set up our "Cloud DNS" and DNS records. From the menu on the left, go to Network services > Cloud DNS.

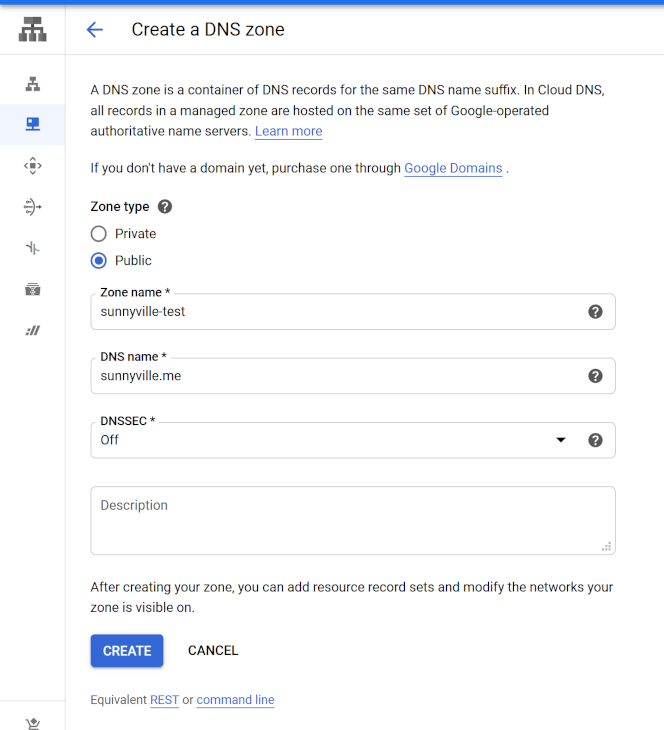
Then click on CREATE ZONE.
Enter the domain name as the DNS name that you want to use. Click the Create button.
Basic configurations will automatically be created for you. Mine looks like this:
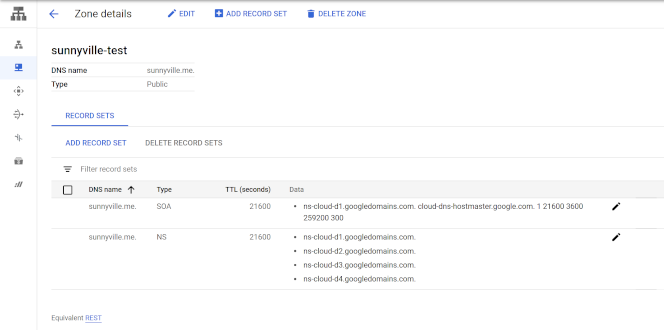
Next, we need to add custom records for our Domain names, namely the A record and the CNAME record.
Click on "ADD RECORD SET".
- Adding an "A" recordset:
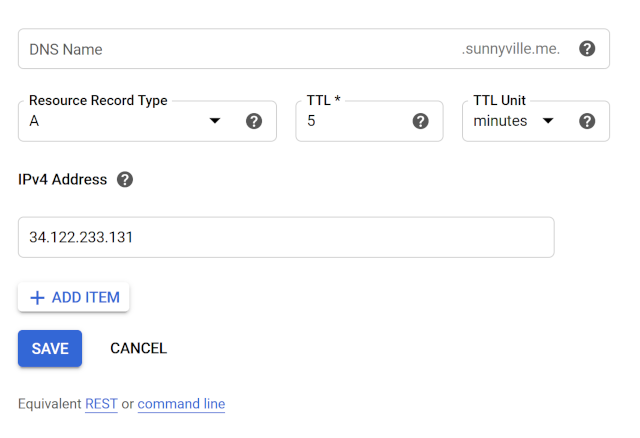
- "A" record is used to point your domain name to the static IP address of your server.
- Leave the DNS Name blank (only showing your domain name.
- Enter the static IP address as the IPv4 Address.
- Hit Create.
- Click on "ADD RECORD SET" again to add a "CNAME" record.
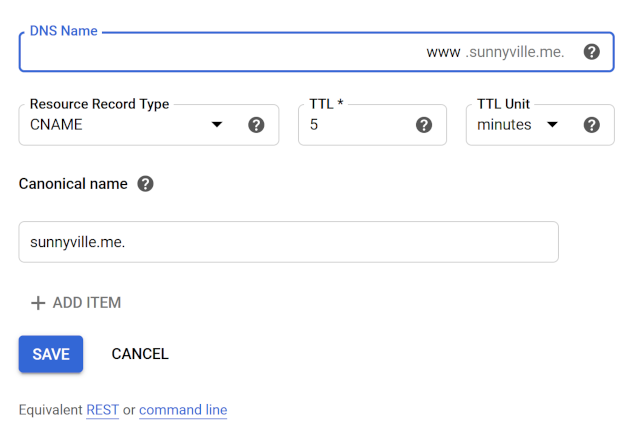
- "CNAME" record will allow your website to be accessible through "www".
- Enter "www" as the DNS Name.
- Enter your domain name as the Canonical Name.
- Hit Create.
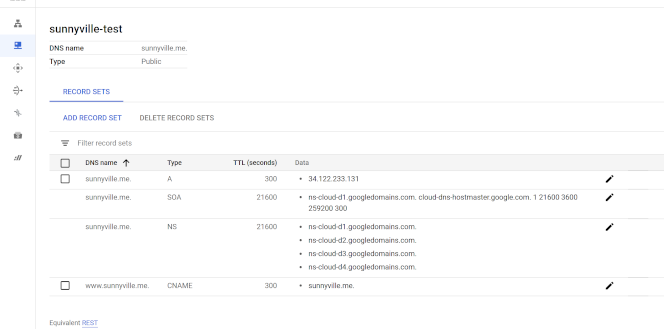
This is what my Zone details look like:
Step 2: Update Domain Nameservers (DNS)
Now that we have our DNS records set on the GCP side, we need to actually point our domain to it.
My domain is registered with Namecheap.com, and that's where I'll have to update my "nameserver". You should be able to easily follow the same instructions as below in your domain name provider, incase, it is not Namecheap.
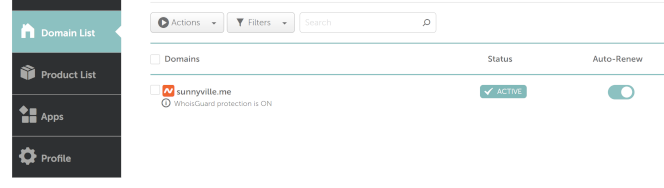
If you are on Namecheap, click Domain List, find your domain name and click Manage.
In the Nameservers section of the page. Paste in the Nameservers that you were given in the Google Cloud DNS setup. I've added mine like so:
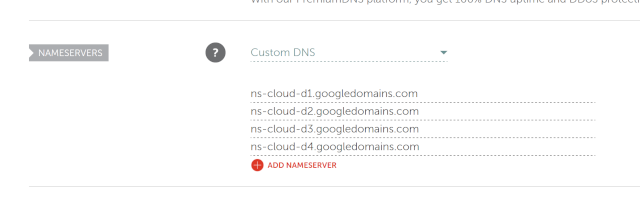
Once entered, click the Green Tick mark to update the nameservers.
It will take few hours for the propagation period to complete. In the meantime, we will update our initial setup to the new IP address and also the domain name.
Step 3: Making changes to the old setup
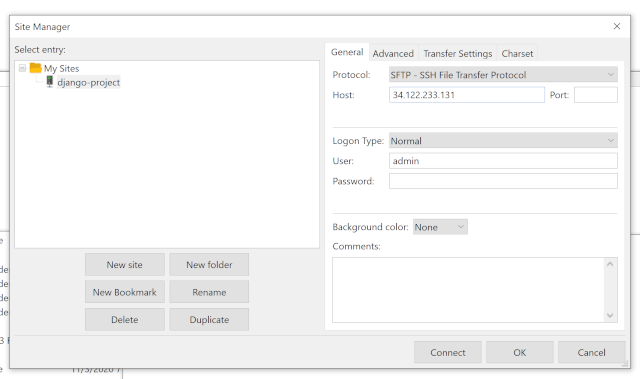
Open FileZilla and change the IP address for the host to the new static IP address
Then edit your settings.py file and replace the old IP address with the new one, and also add your domain name in the ALLOWED_HOSTS variable. This is what mine looks like now:

Please also go ahead and replace the IP address in your PuTTy settings as well, then SSH into the server and restart the Apache service.
sudo service apache2 restart
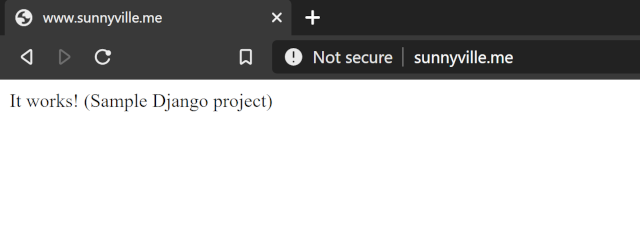
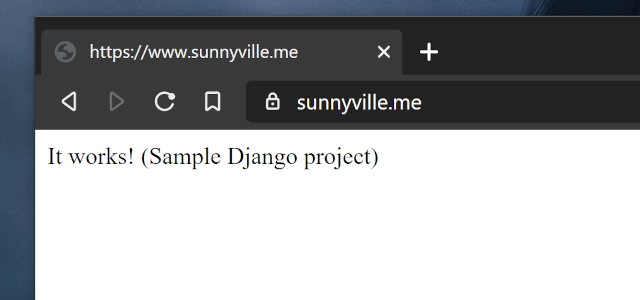
So after making these changes, and waiting for few hours, I can now enter my domain name 'sunnyville.me' in the browser and see that it works:
You should also now be able to do the same and see if your application works on your domain name.
If it does work, congratulations!
2. Setup SSL to use https instead of http
Now, although it's great that our website is now live; however, it is only available through "http", which isn't that great.
In this section I will show you how to set up an SSL certificate for your website for free, so that your website uses the Https protocol instead of Http.
We will do this by using the Let's Encrypt service, which as I said earlier is completely free:
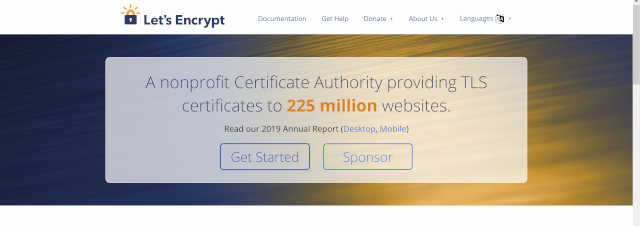
So head over to their website and click on the "Get Started" button. On that page, it says that it is recommended for people that have shell access to their server (which we do), that they use their Certbot (https://certbot.eff.org/) client. So please click on their Certbot link.
The Certbot page allows you to select your Server and your operating system. In our case, it is Apache and Debian 10 (Buster), respectively:
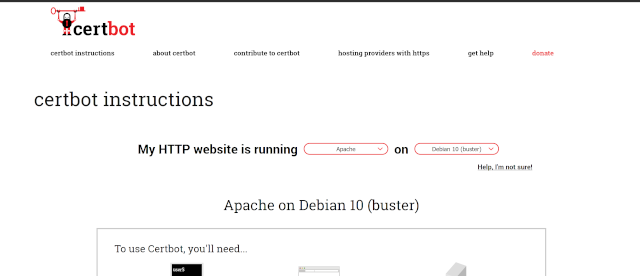
Obviously, if you have chosen a different setup then your installation instructions may be different than mine.
Note: If you have followed Part 1 of this series, then there is one extra step you have to do, in order for it to work correctly. I will discuss that shortly. But first, let's start with the initial steps outlined on the Certbot page.
SSH into the system: I have already done this using PuTTy.
Install snapd:
sudo apt update
sudo apt install snapd
Log out and log back in, as the instruction says.
Install core to get the latest snapd
Install hello-world snap and make sure it works correctly
sudo snap install core
hello-world
Ensure that the version of snapd is up to date
sudo snap install core; sudo snap refresh core
Remove any Certbot OS package
sudo apt-get remove certbot
Install Certbot
sudo snap install --classic certbot
Prepare the Certbot command
sudo ln -s /snap/bin/certbot /usr/bin/certbot
Now certbot is installed and ready to be used. However, there is one thing we have to do before continuing with further instructions.
Before actually running the certbot command, it is important to make a small change to our Apache configuration file.
I will use use nano to edit myproject.conf:
Open myproject.conf for ediiting
sudo nano /etc/apache2/sites-available/myproject.conf
The first thing we need to change is to uncomment the ServerName variable and set it to your domain name. In my case it is "www.sunnyville.me".
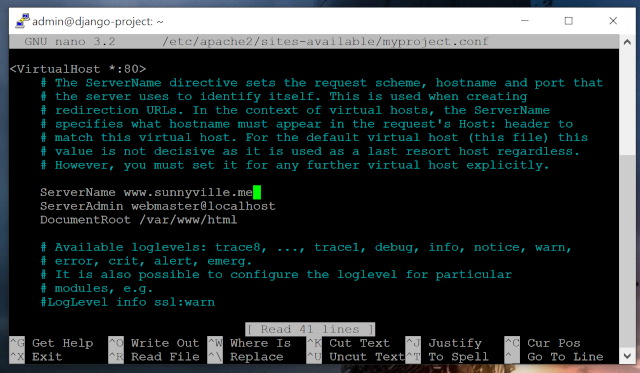
Then scroll down and comment out the WSGI commands.
The reason we commented-out the WSGI commands is as follows:
When we run the certbot command, as mentioned in the installation guide, it will do two things.
First, it will add some redirect rules in our configuration file (myproject.conf).
Second, it will create a new configuration file (myproject-le-ssl.conf) and use contents from myproject.conf file to populate it. However, there are a few things in myproject.conf file that should not be copied over to the new file. Hence, we temporarily commented-out those commands and will uncomment them later, once it's all done.
Save the file and exit.
- Run the Certbot command for Apache
Running the certbot command
It is going to ask you to enter your email address and to agree to the Terms of Service. Then it will ask you to choose the site to enable Https for. In my case, the only option was "www.sunnyville.me", so I entered empty to select "all" the options.
After it's done processing, you can verify that certbot has made some changes to your configuration file (myproject.conf), and also created another file (myproject-le-ssl.conf) in the same directory.
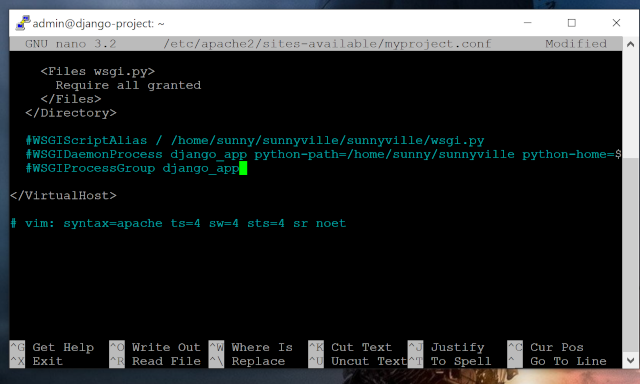
Now, I will nano into myproject.conf and remove all the unnecessary lines of code:
Open myproject.conf for editing
sudo nano /etc/apache2/sites-available/myproject.conf
I will remove all the lines related to the Directories since all of this information is now available in the new configuration file.
After deleting these lines, this is what myproject.conf looks like now:
<VirtualHost *:80>
    # The ServerName directive sets the request scheme, hostname and port that
    # the server uses to identify itself. This is used when creating
    # redirection URLs. In the context of virtual hosts, the ServerName
    # specifies what hostname must appear in the request's Host: header to
    # match this virtual host. For the default virtual host (this file) this
    # value is not decisive as it is used as a last resort host regardless.
    # However, you must set it for any further virtual host explicitly.

    ServerName www.sunnyville.me
    ServerAdmin webmaster@localhost
    DocumentRoot /var/www/html

    # Available loglevels: trace8, ..., trace1, debug, info, notice, warn,
    # error, crit, alert, emerg.
    # It is also possible to configure the loglevel for particular
    # modules, e.g.
    #LogLevel info ssl:warn

    ErrorLog ${APACHE_LOG_DIR}/error.log
    CustomLog ${APACHE_LOG_DIR}/access.log combined

    # For most configuration files from conf-available/, which are
    # enabled or disabled at a global level, it is possible to
    # include a line for only one particular virtual host. For example the
    # following line enables the CGI configuration for this host only
    # after it has been globally disabled with "a2disconf".
    #Include conf-available/serve-cgi-bin.conf

RewriteEngine on
RewriteCond %{SERVER_NAME} =www.sunnyville.me
RewriteRule ^ https://%{SERVER_NAME}%{REQUEST_URI} [END,NE,R=permanent]
</VirtualHost>

# vim: syntax=apache ts=4 sw=4 sts=4 sr noet
Note that the lines related to the Rewrite rules were added by certbot and they basically redirect requests from "http" to "https".
And now you also need to edit the new configuration file that certbot has created. Mine is called myproject-le-ssl.conf:
Nano into the new configuration file
sudo nano /etc/apache2/sites-available/myproject-le-ssl.conf
You can see all the lines of code that were copied over from myproject.conf. Scroll down and uncomment the WSGI lines that we had commented-out in the previous step.
Save the file and exit.
Restart the Apache service:
sudo service apache2 restart
Now if I refresh my page, I can see that I get redirected to the https version of my website and it is also showing the lock icon in my browser.
Renewing certificates
A thing about the ssl certificate is that they only last for around 90 days and after that, they have to be renewed.
Following is how you can do a dry run to update the certificates:
Dry-run of renewing the certificates
sudo certbot renew --dry-run
Dry run means that it will not actually update it but just show that it can, if run without the --dry-run part.
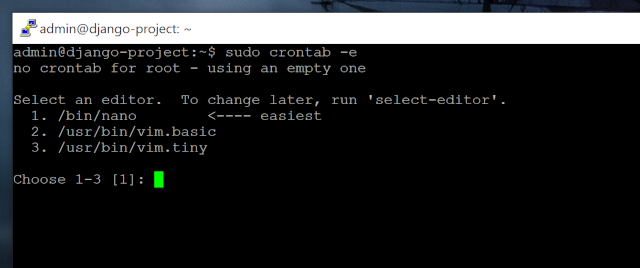
We will create a cron job to run the sudo certbot renew code, and set it to run every month automatically.
Please enter the following command to create a new cron job.
Creating a cron job
It's going to ask you to choose an editor. I'm going to choose nano.
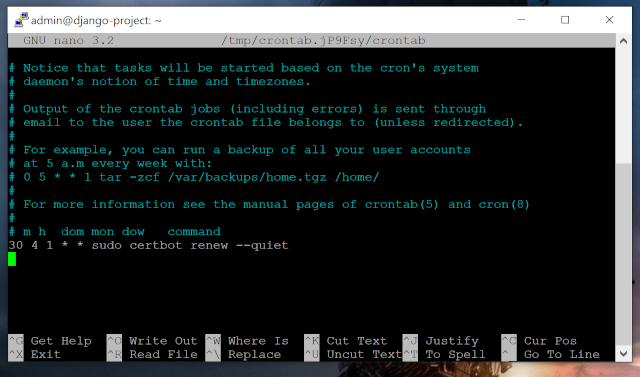
Add the following code at the bottom of the file, then save and exit.
Code to quitely renew the certificate every month
30 4 1 * * sudo certbot renew --quiet
This is what it looks like in nano:
The certificate will now get renewed every month, and our website will continue to be accessible only through https.
3. Redirect non-www to www
Currently, it is possible for my website to be accessible either through www.sunnyville.me and also sunnyville.me. This essentially means that there are two versions of my website, which can be very undesirable for all sorts of reasons.
One solution to fix this is to redirect all the traffic from one of these versions to another, and we can do this very easily by adding a Redirect rule in our configuration file:
So again, nano into your configuration file, and add this at the bottom:
Adding this to myproject.conf
<VirtualHost *:80>
    ServerName sunnyville.me
    Redirect / https://www.sunnyville.me
</VirtualHost>
Now if you try to access your site through the non-www url, you should get redirect to the www version of the site, like so:
And that's it!
Congratulations on finishing the tutorial! I hope you were able to follow along smoothly.
Please consider sharing this if you found this useful and thank you for reading!